What Is Hardwood Floor Cupping?
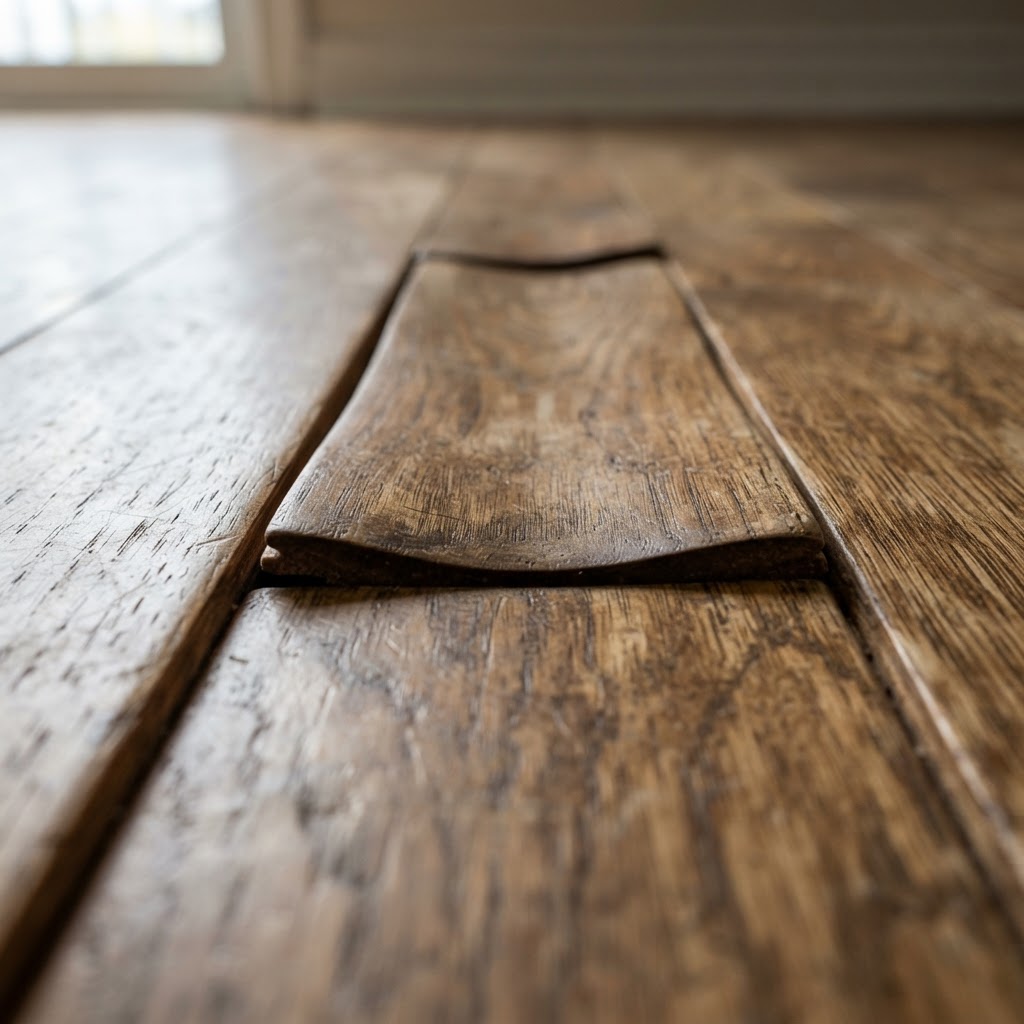
Hardwood floor cupping is one of the most common forensic flooring failures across Southern California. The condition is identified by boards whose edges have risen above the center plane, creating a concave or wave-like profile across the surface. Cupping is rarely a cosmetic issue alone — it signals active or historical moisture imbalance within the floor assembly.
Industry standard NWFA Technical Publication: *Hardwood Flooring and Moisture* defines cupping as a condition caused by moisture imbalance across the thickness of the board. When the bottom face absorbs significantly more moisture than the top face, the bottom swells more than the top, forcing the edges upward.
Root Cause Analysis
Why Hardwood Floors Fail
Hardwood flooring is hygroscopic — it absorbs and releases moisture in response to its environment. The vast majority of hardwood floor failures trace back to moisture in one form or another: moisture imbalance within the wood, moisture migrating from the subfloor, or humidity outside the 30–50% RH comfort zone. When moisture conditions exceed what the wood can tolerate, boards distort, finishes fail, and the installation deteriorates.
Moisture Imbalance Across Board Thickness
When one face of a plank absorbs more moisture than the other — typically the bottom face from subfloor vapor — the board cups or crowns. Even a 2–3% moisture content differential across the board thickness is enough to cause visible distortion.
Inadequate Acclimation
NWFA guidelines require hardwood to acclimate to the installation environment before installation. Flooring installed before reaching equilibrium moisture content (EMC) will move after installation — cupping, gapping, or buckling within weeks.
Missing or Non-Compliant Vapor Retarder
Hardwood installed over concrete without a code-compliant vapor retarder absorbs slab moisture continuously. This is one of the most frequently documented defects in forensic hardwood inspections across Southern California.
Subfloor Moisture Exceeding Manufacturer Limits
Most hardwood warranties require ASTM F2170 slab RH below 75–80%. Installing over a slab that exceeds these limits without mitigation is a non-compliant installation that voids the warranty.
Environmental Humidity Outside 30–50% RH
Sustained indoor humidity above 60% or below 25% causes wood to swell or shrink beyond its design tolerance. HVAC systems that are undersized, disabled during absences, or poorly maintained are common contributors.
What Causes Hardwood Floor Cupping?
Subfloor or Slab Moisture Vapor Emission
Water vapor migrating upward from concrete slabs or crawlspaces is absorbed by the underside of hardwood planks. Even small differentials in moisture content (as low as 2–3%) across the board thickness are sufficient to cause cupping. In Southern California, older post-WWII concrete slabs without adequate vapor retarders are a primary source.
Plumbing Leaks
Slow leaks from refrigerator water lines, dishwashers, or under-slab plumbing create localized or widespread moisture elevation. Pinhole leaks may go undetected for months before flooring symptoms appear.
Elevated Indoor Relative Humidity
Sustained indoor humidity above 60% RH introduces moisture to the surface of hardwood. HVAC systems that are undersized, poorly maintained, or disabled during extended absences are common contributing factors.
Improper Acclimation
NWFA guidelines require hardwood flooring to acclimate to the installation environment prior to installation. When flooring is installed before it has equilibrated to the ambient EMC (Equilibrium Moisture Content), boards may begin cupping within weeks.
Inadequate or Missing Vapor Retarder
Failure to install a code-compliant vapor retarder beneath wood flooring installed over concrete is one of the most frequently documented installation defects in forensic hardwood inspections.
Symptoms to Look For
- Visible concave profile across board width when viewed at a low angle
- High edges that catch footwear or create a rough surface texture
- Boards feel uneven underfoot in areas of affected floor
- Cracking or splitting along the center of boards in severe cases
- Cupping concentrated in specific zones (near plumbing, exterior walls, or HVAC vents)
What an Inspector Checks
When to Call an Inspector
Call a certified flooring inspector when you observe cupping that:
• Covers more than a localized section of flooring
• Has been present for more than a few days without improvement
• Is associated with a recent water event, plumbing repair, or HVAC change
• Is part of a warranty claim, insurance claim, or contractor dispute
• Is developing in a newly installed floor
Do not sand, refinish, or attempt correction before the moisture source is identified and documented. Premature sanding of cupped floors frequently causes irreversible crowning.
Our Inspection Process
Frequently Asked Questions
Can cupped hardwood floors be fixed without replacement?
Mild cupping can reverse naturally once the moisture source is corrected and the floor is allowed to re-acclimate. Moderate cupping may require controlled drying followed by refinishing. Severe cupping with permanent distortion or structural damage typically requires replacement. A certified inspection establishes which path applies before remediation begins.
How long does it take for cupping to develop?
Cupping from an acute moisture event (burst pipe, flood) can appear within 24–72 hours. Cupping from chronic moisture imbalance (slab vapor, humidity) typically develops over weeks to months. The rate depends on wood species, board thickness, finish, and the magnitude of the moisture differential.
Is hardwood floor cupping covered by homeowner's insurance?
Cupping caused by a sudden and accidental water event (appliance failure, burst pipe) is typically covered. Cupping from long-term moisture accumulation or maintenance issues is usually excluded. A certified independent inspection report establishes the cause and timeline, which is critical for insurance evaluation.
What is the NWFA standard for acceptable cupping?
NWFA Technical Publications do not define an acceptable level of cupping — cupping is considered a condition requiring investigation and moisture correction. The standard is that hardwood flooring should be installed and maintained within the manufacturer's and NWFA's specified moisture content ranges.
Why shouldn't I sand cupped floors?
Sanding cupped floors while they are still moisture-loaded removes material from the elevated edges. When the floor later dries and returns to normal moisture content, the board profile reverses — the sanded edges are now lower than the center, creating 'crowning.' This is a permanent condition that cannot be corrected without replacement.